The Painting Process - Issue Nº 5
In this series, I share the stories behind my paintings, my thought process, and the discoveries I make along the way.
※※※※
Composition, Reflected Light and the Illusion of Depth
When the weather is not ideal for painting outside in the winter, I often paint animals in my studio. Painting animals is usually more challenging than painting landscapes because I need to be very careful with proportions (which is not so important when you paint clouds and mountains), but it’s also fun. Seeing how an animal becomes alive in your painting is fascinating. It always makes me smile and reminds me why I love painting animals so much.
I had wanted to make a painting out of this photograph for a very long time, but every time I looked at the photo, I thought about the background, which was too blurry and didn’t provide enough information for a painting. I knew I would have to figure out how to make the background in my painting look more natural and interesting than it looked in this photo
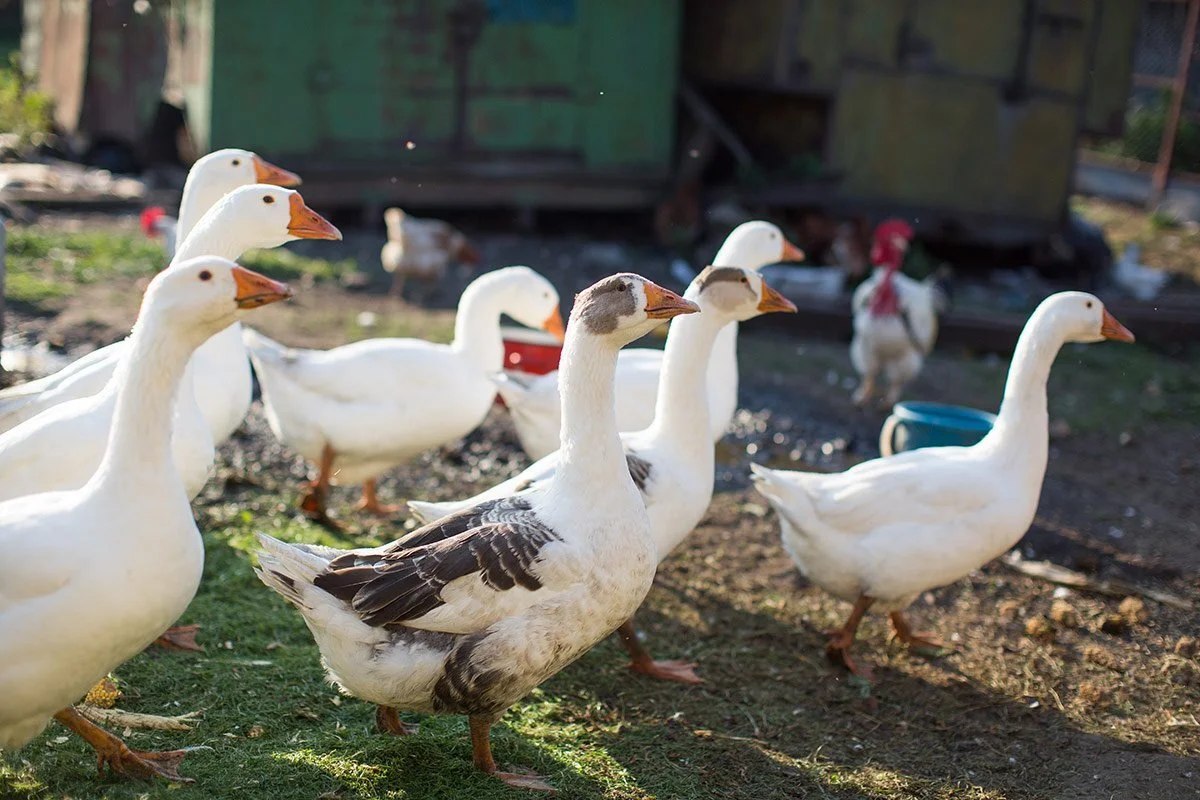
One day, I decided that I wanted to spend a couple of days gathering more pictures of chickens that I could use for the background characters in my painting. It turned out that finding the photos I needed wasn’t difficult at all. One of the most important secondary characters was the rooster behind the blue bucket, which looked extremely blurry in the photo. I knew that it would become a secondary focal point in my painting, so I needed to find a nice photo of a chicken or a rooster that I could use to replace the rooster in the photo. I googled a chicken, found several wonderful candidates for my painting, and picked the one below. (Actually, my first choice was a rooster, but when I drew it, I thought its silhouette was a bit boring, so I changed it to this chicken instead.)

The chickens in the background didn’t need to be as detailed as the one in the middle ground because they were “farther away” in the composition, so I simply opened google images, typed “chicken” in the search box, and drew a few small chickens from some of the photos I was shown, without even saving the photos to my computer.
I didn’t want to include all of the geese in the main photo reference in my painting. I only included five of them so that the painting didn’t look too busy.
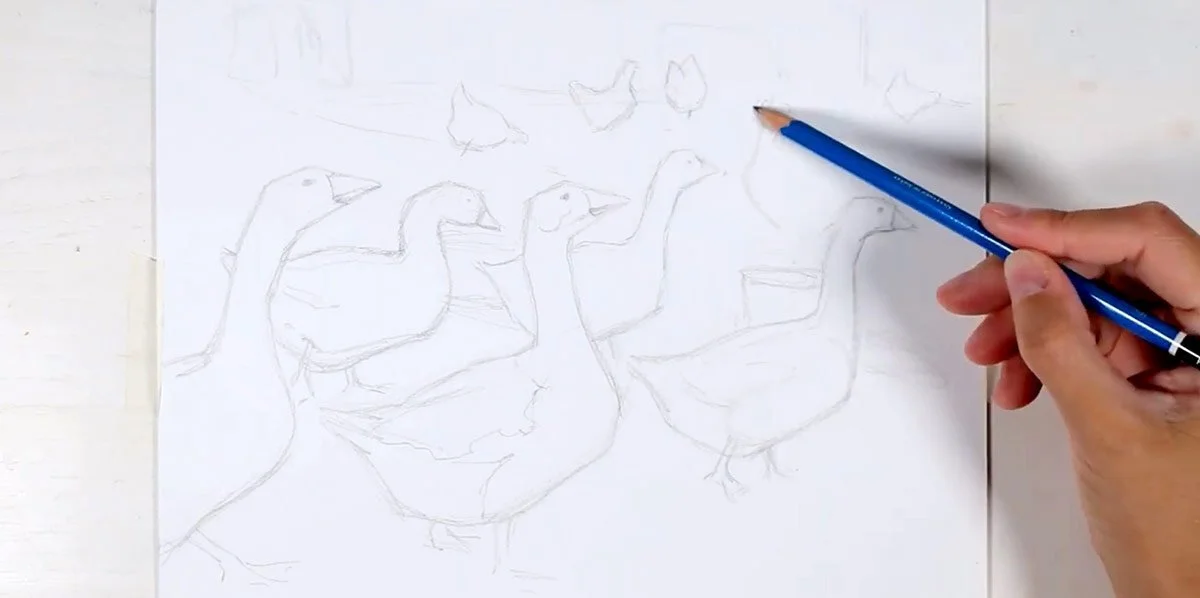
Once the drawing was finished, I moved on to the fun part - painting!
Since the biggest part of the composition consisted of shadow shapes, I had to make my shadows interesting. Fortunately for me, all of the birds, except for the goose with dark spots, were completely white. Painting white objects against light is a real pleasure because as long as I preserve the values of the biggest shapes and keep my colors slightly neutralized, I can use all the rainbow colors to paint the shadows.
Outdoors, the shadows on white objects are always colorful on a clear day. The light that is reflected off the ground makes the shadow planes facing the ground warmer, while the cool light that reflects off the sky makes the planes that face the sky cooler. This creates a beautiful contrast of warm and cool colors in the shadows, making the painting colorful and filling it with light.
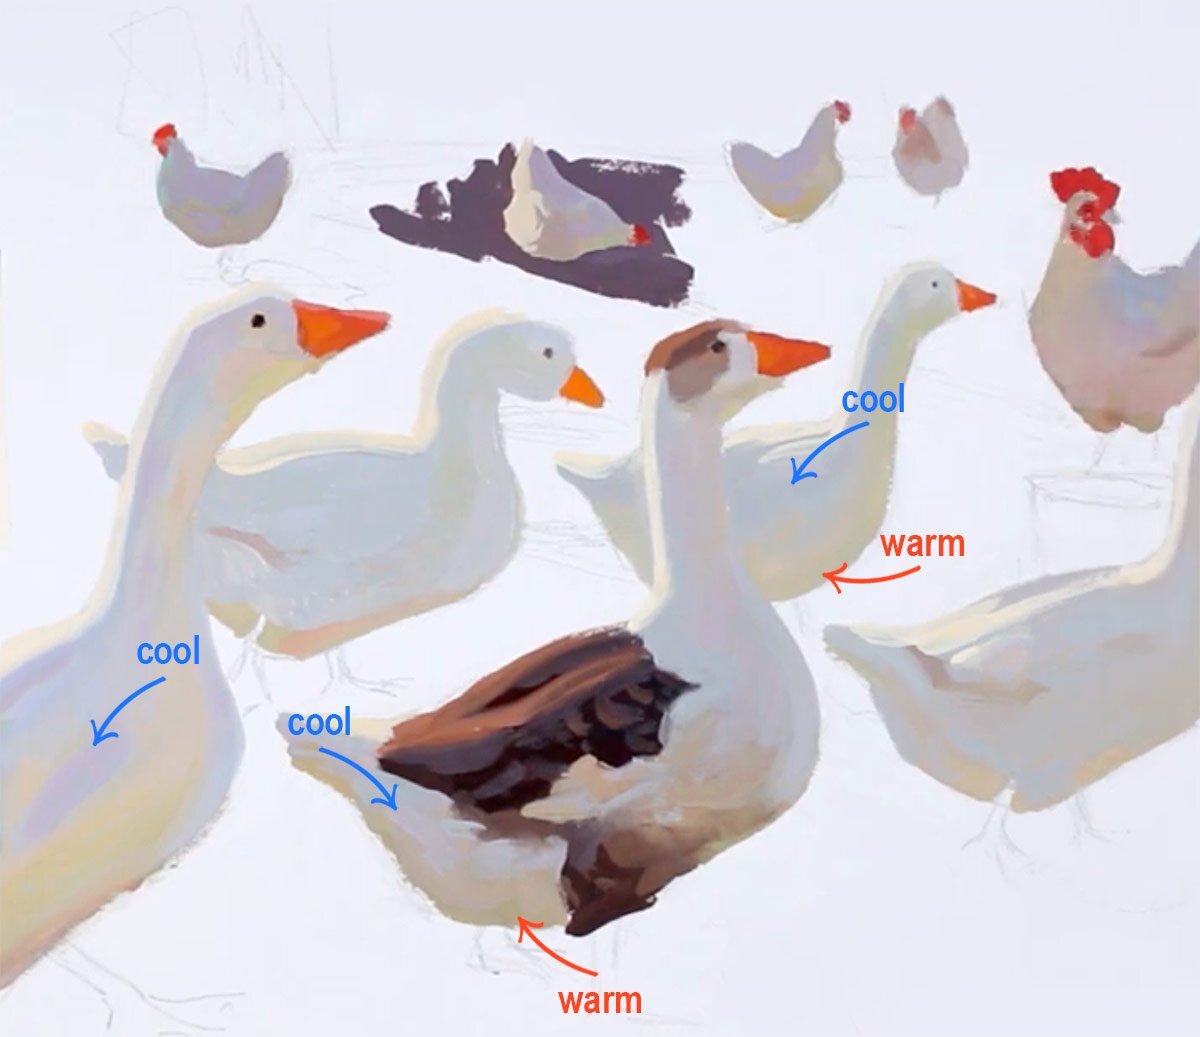
The local color of the white birds was very light; therefore, I had to keep the shadow on them light in value so that when I surrounded the birds with the dark colors of the ground, they would appear to glow.
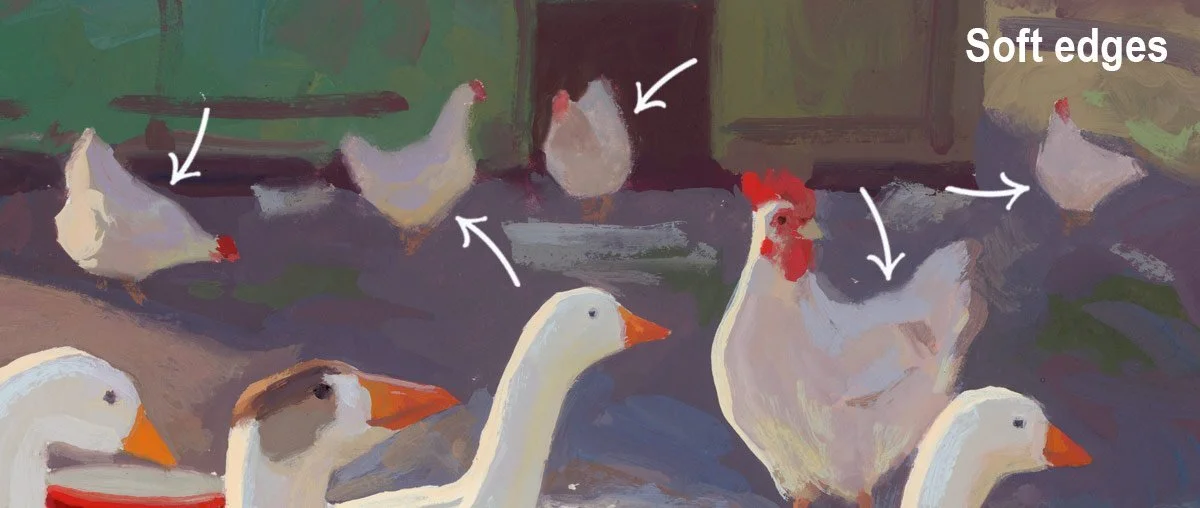
Another challenge I especially enjoyed dealing with was creating a sense of depth in this painting through the use of soft edges. Soft edges make objects recede in a painting, so they work really well for creating a sense of space and depth.
Notice how much softer some of the edges on the chickens in the background are compared to the edges on the geese. I wanted the chickens to appear deeper in the painting than the geese, so I significantly softened the edges on them to make them merge slightly with the background shapes. I also made the chickens in the background less detailed for the same reason.
I wanted to make the three chickens that were out in the light my secondary focal points, so I left the edges of the light shapes on them harder so that the eye could jump easily from the geese to the large chicken in the middle ground, and then, to the two chickens in the background at left.
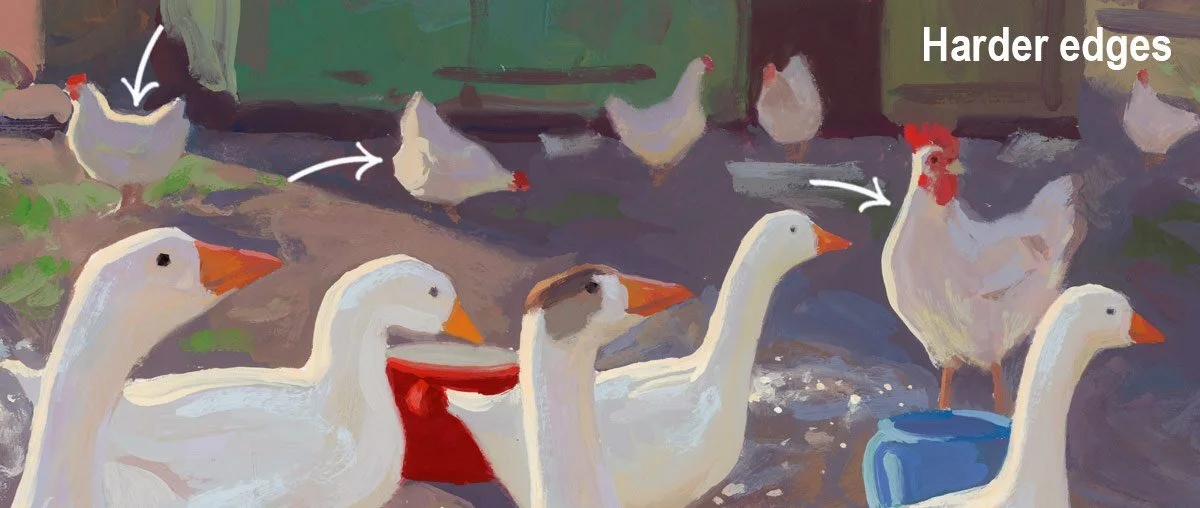
I left all of the geese with pretty sharp edges because the geese as a mass were my main focal point.
As usual, I tried to add as few details as possible to this painting to preserve its mood and softness. I also worked really slowly, painting shapes in a puzzle-like manner and ensuring that every color I applied to the painting had the right hue, value, and saturation.
This is how the painting turned out in the end.

You can see how I painted this piece in the video at the link below:
Happy painting!
Lena.
P.S. If you enjoyed this article you might also enjoy my free E-Books and painting guides that can be downloaded here: https://www.lenarivo.com/free-guides
Download my free 30-page PDF, “Everything you Need To Know About Gouache”
In this 30-page PDF you will learn:
How to decide which colors you need when you start with gouache and how you can expand your palette to make it even more effective.
What kind of storage palettes to use with gouache to prevent your beautiful colors from fast drying.
Why you need to use two whites with gouache.
How to choose the right paper and what kinds of brushes work best with gouache.
About the setup that I like using for plein air painting with gouache.
You will also be provided with many useful tips that will make your painting experience smoother.