The Painting Process - Issue Nº 7

In this series, I share the stories behind my paintings, my thought process, and the discoveries I make along the way.
※※※※
Painting with Gouache on Ampersand Claybord and Aquabord
Changing painting surfaces, just like switching between different mediums, can lead an artist to unexpected discoveries of new painting techniques and inspire fresh ideas. So this is what I have been doing for the past few weeks - trying new support surfaces.
Usually, when I expect to varnish a gouache painting, I paint it on a Strathmore Mixed Board, which is acid-free and sturdy enough for framing without glass. The surface of these boards resembles cold-pressed watercolor paper, and I really like painting with gouache on them.
Last December, when I was cleaning my studio, I found two 5x7 Ampersand Panels - a Claybord panel and an Aquabord panel. I thought it would be cool to test them with gouache. I didn’t have any expectations, but I was excited about trying new painting supports.
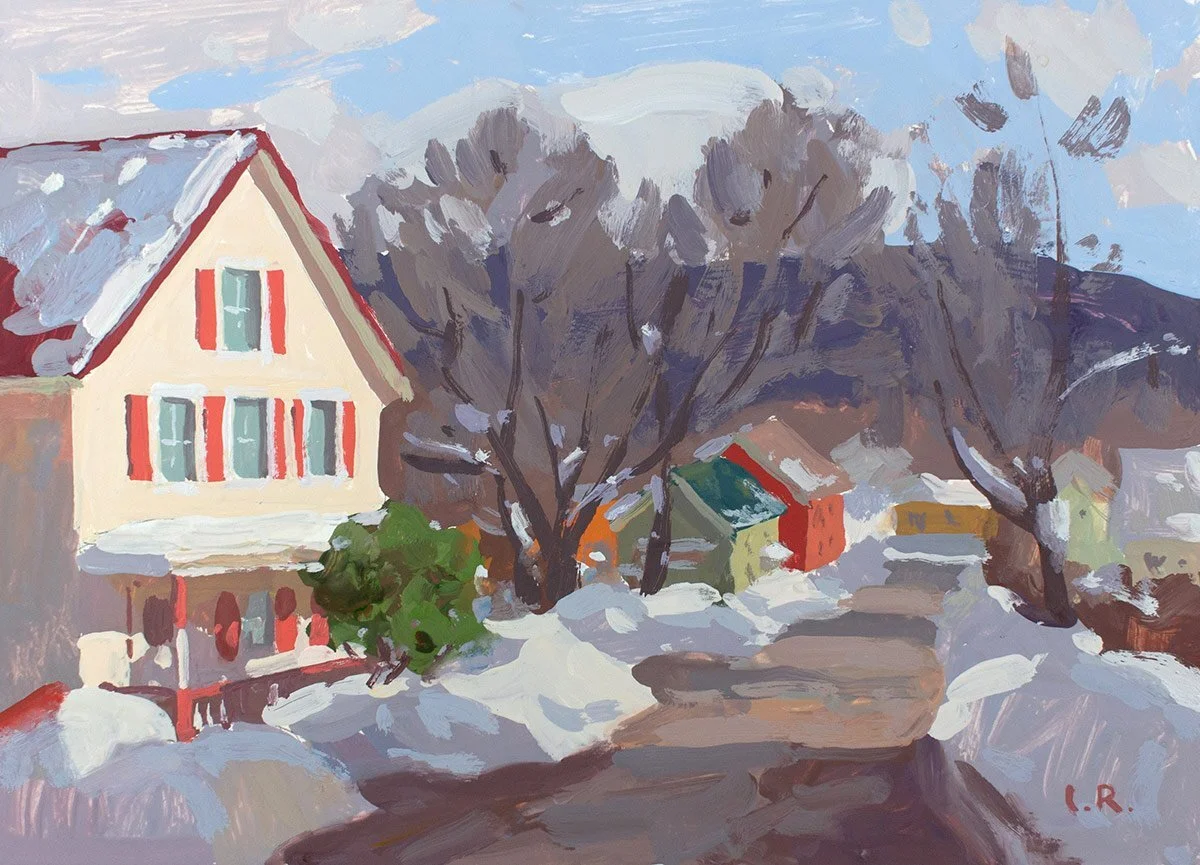
“Winter in Vermont”, gouache on Claybord, 5 x 7 in.
The first panel I tried was the Claybord. Its surface was smooth like glass, but gouache laid really nicely on it, forming an opaque layer. When I tried to soften the edge between two shapes in my painting, I realized that the panel’s surface didn’t absorb the gouache paint. When I touched the painting with my damp brush to soften an edge, the color would immediately lift into the brush, leaving a white spot on my painting where the base surface was showing. It didn’t discourage me from continuing to paint but it did teach me that when painting on Claybord, I should soften edges carefully and quickly with the slightest touch of the brush. Also, the paint layer should be thick enough because colors applied in thin layers will lift easily.
I was happy with the finished result. The colors looked as they should, and I liked the weight of the panel when held in my hands. The quality of these panels is extraordinary.
So this was my first gouache painting done on Claybord.
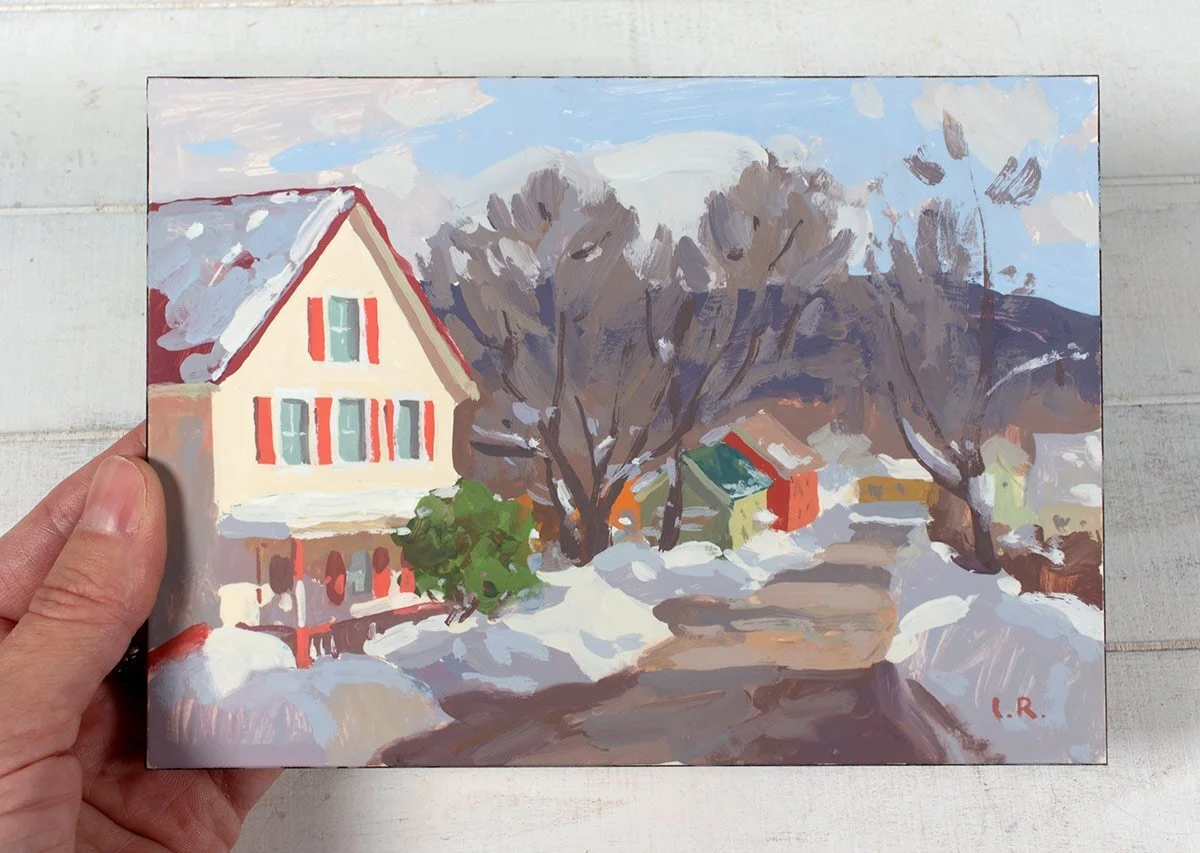
Here, the painting is varnished.
After this study, I did two more finished paintings on Claybord. This is one of them.
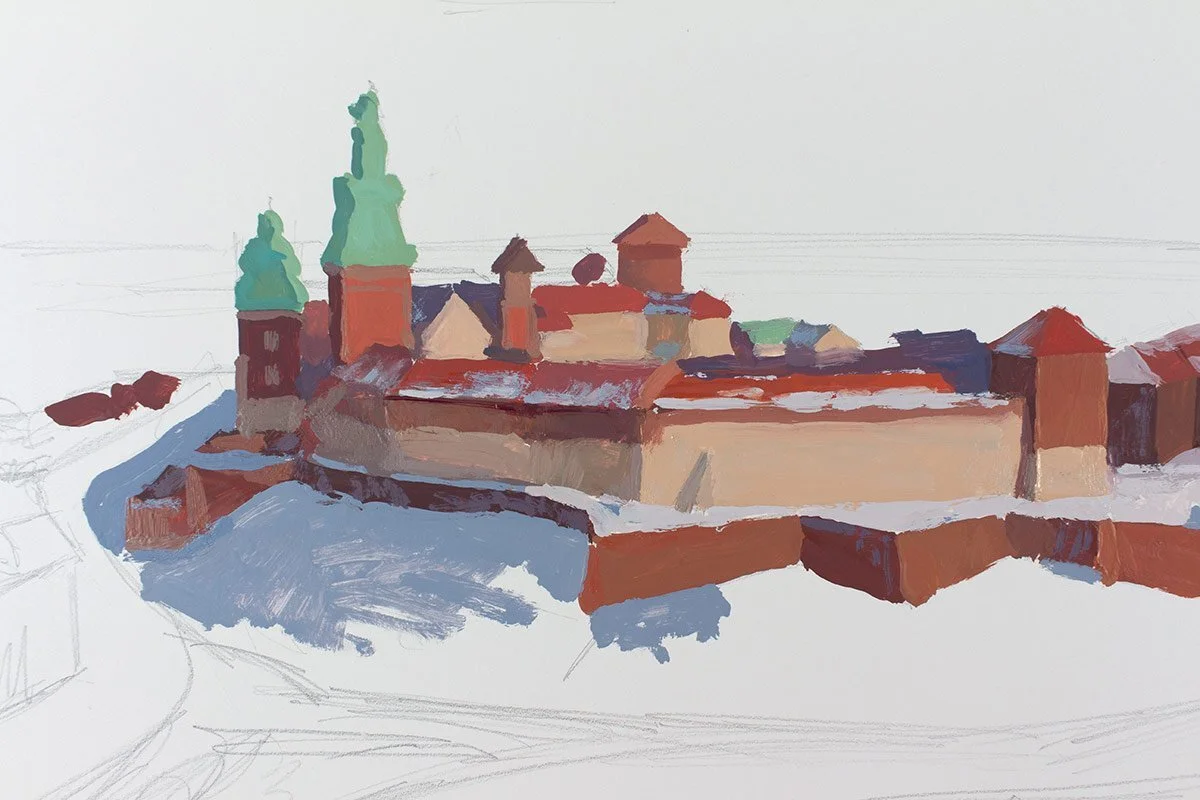
The surface of Claybord feels nice when touched with a brush. It’s smooth but not slippery, so I really enjoyed painting on these panels. Being aware of the color lifting problem, I tried to avoid corrections, and when I needed to soften some edges, I did that carefully with very little pressure on the brush.
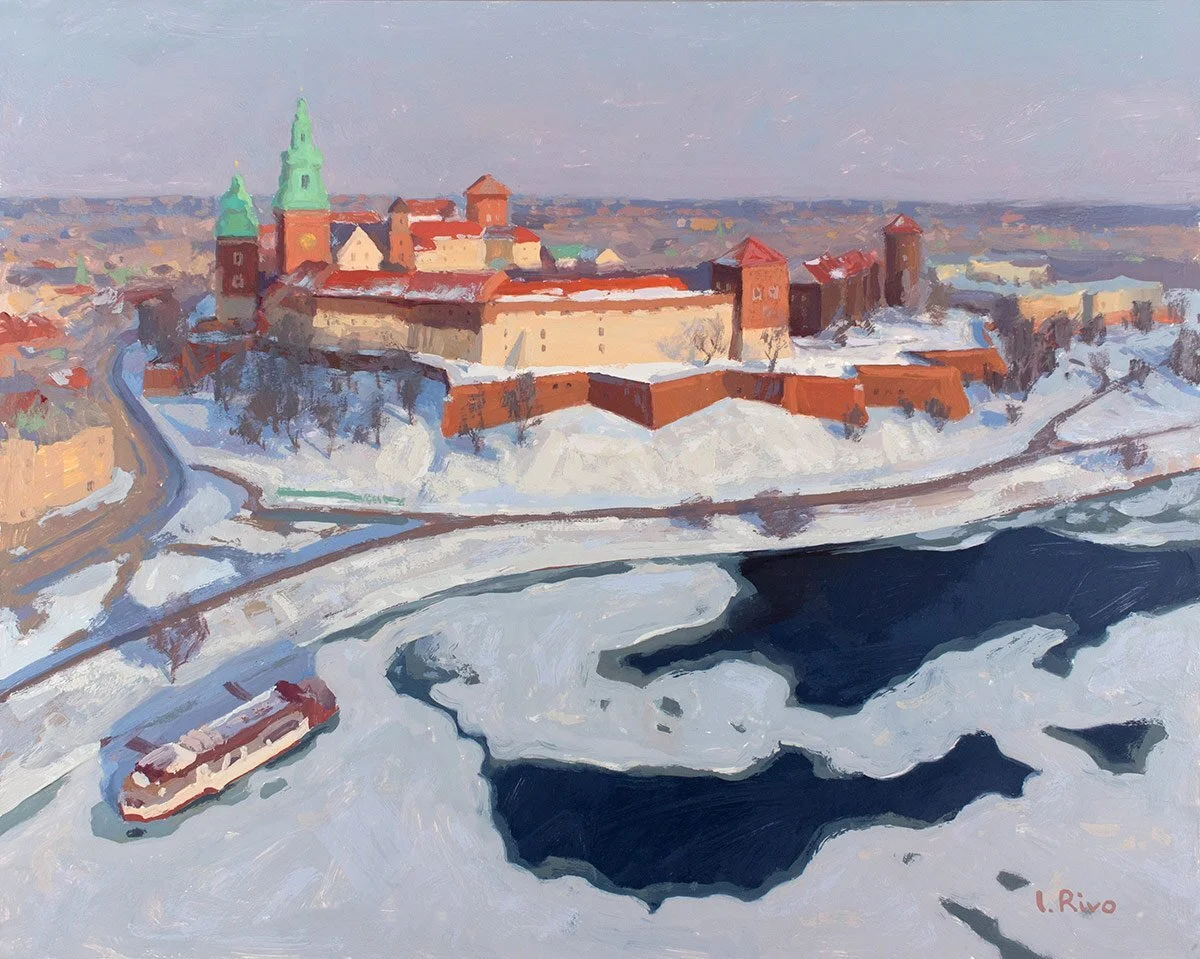
Wavel Royal Castle, gouache on Claybord, 9 x 12 in.
Claybord seems to be an excellent support for confident gouache painters who don’t make many corrections in their paintings. These panels accept gouache nicely, and even though their surface doesn’t absorb gouache paint, it sticks very well, which allows the paint to be applied easily in several layers. The key is not to dilute your paint too much. When you apply gouache in opaque layers, keeping a creamy consistency, it results in a painting that looks like oil, especially when varnished.
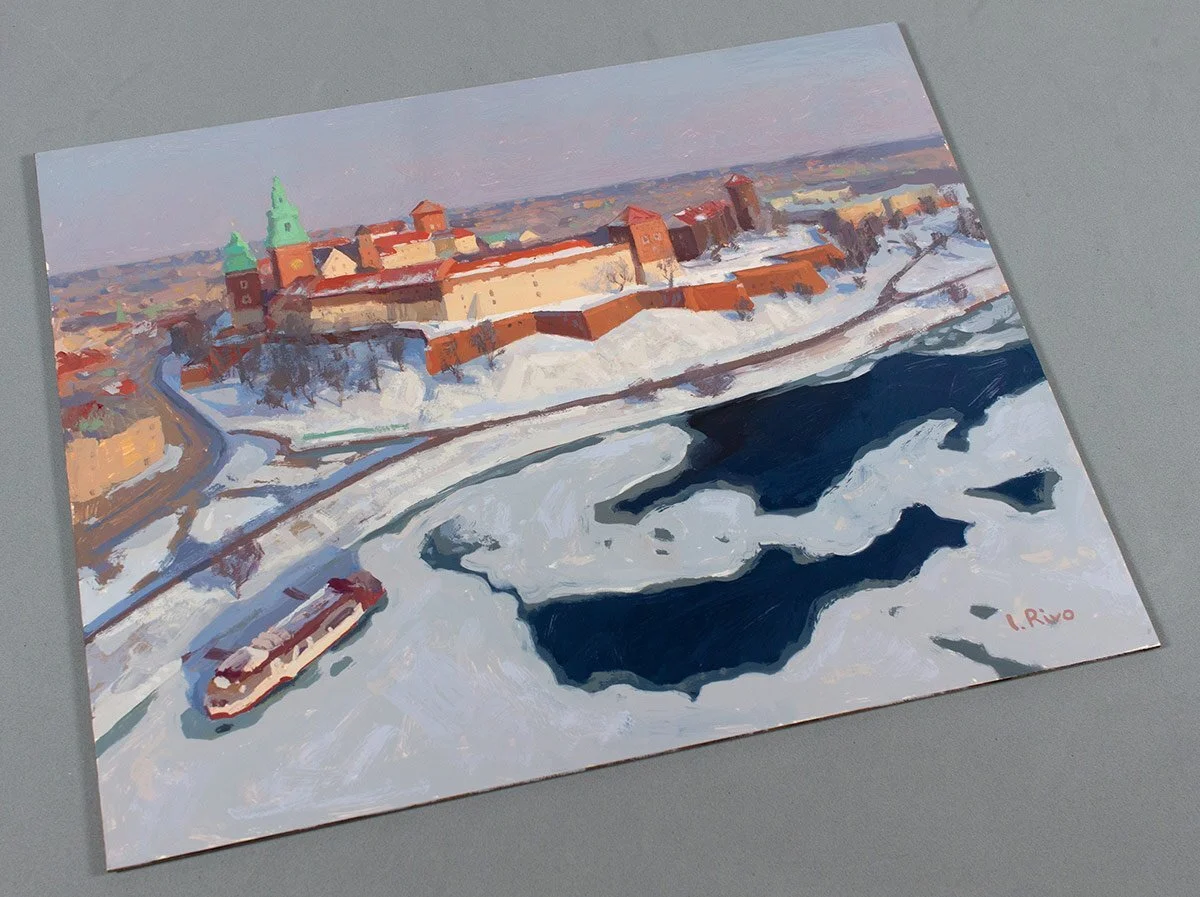
Here the painting is already varnished.
If you correct your gouaches a lot as you paint, Aquabord would probably be a better choice.
This is the first painting that I did on my 5x7 Ampersand Aquabord panel.

Winter lights, Gouache on Aquabord 5 x 7 in.
Right from the start, I noticed two things that made Aquabord very different from Claybord. Aquabord had a surprisingly rough, coarse surface, and it was obvious that watercolor brushes would wear out very quickly on it. Still, the name Aquabord suggested that those panels were created for water media artists. My panel was small, so I didn’t need to worry much about destroying my brushes, and I kept painting. The next surprise was a good one. Blending was super easy on Aquabord. The photo below shows how I blended the edges between different greens and created soft edges around the street lights.

Effortless edge softening made painting on Aquabord easier and more relaxing compared to my experience with Claybord. I didn’t need to worry about color lifting, which was a huge relief.
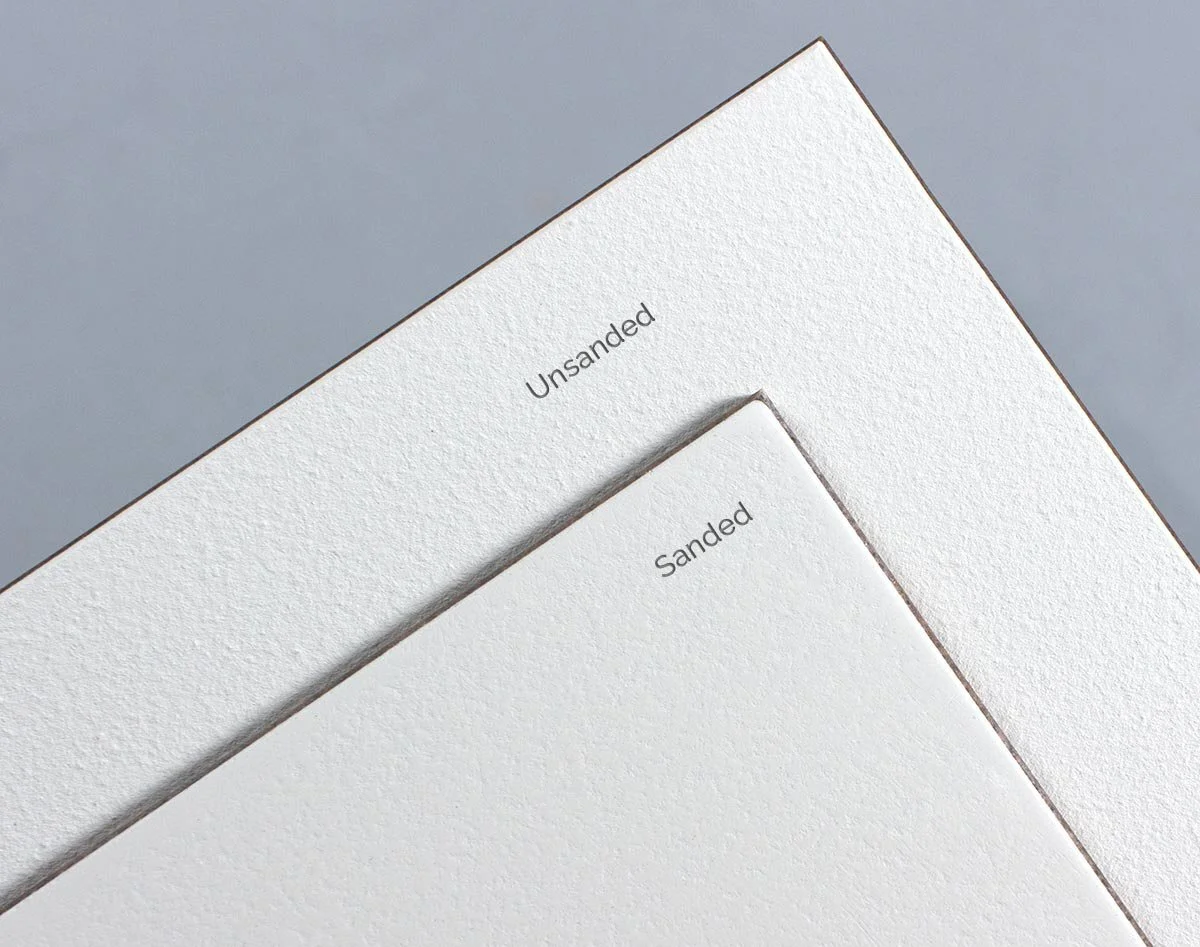
When I published this painting on social media, I said that even though Ampersand Aquabord was absorbent enough to use for painting with gouache, it was way too rough for painting with synthetic brushes. To my surprise, a fellow artist told me Aquabord could be sanded to a perfectly smooth surface. I don’t know why I hadn’t thought about trying to sand the panel’s surface…
I ordered a few more Aquabord panels, and sanded one panel with 600 sandpaper. I stopped sanding when the surface felt smooth to the touch but still had a light texture. After sanding, the Aquabord felt and looked like something between cold and hot pressed watercolor paper - really nice.
Here you can see the difference in texture between the sanded and unsanded Aquabord panels:
Interestingly, the panel’s surface felt somewhat soft, as if it was thick watercolor paper. I could feel that softness with my brush when I painted on it. Overall, working on the sanded panel was a pure pleasure. My brush slid easily on it; the colors blended well and looked clean and bright. I couldn’t wish for more.
Here is a fragment of the painting (in its initial stage) that I did on the sanded panel:
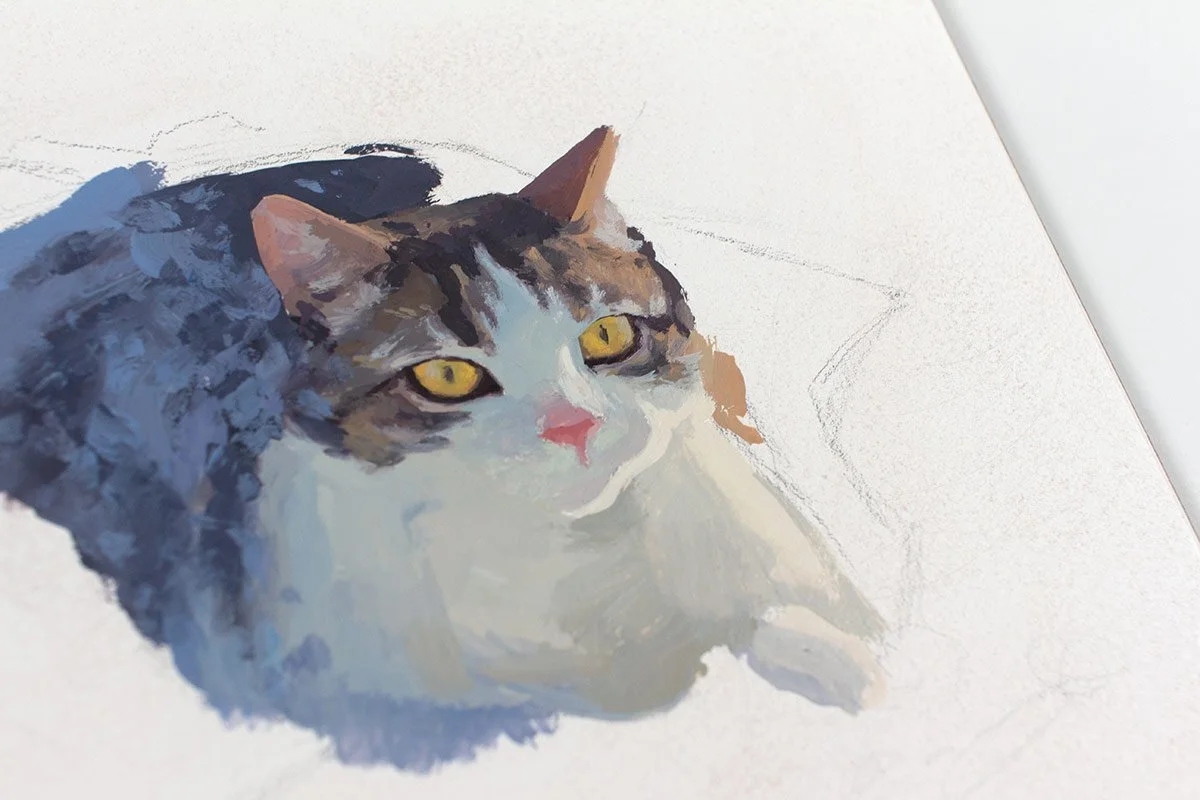
You may notice that the unpainted part of the panel looks a bit warm-toned. That’s because I didn’t like the composition on my first attempt, so I wiped the unfinished painting off with a wet paper towel. All the gouache paint went off easily without any damage to the panel. The panel stayed like new. So, another advantage of these panels is that they are really resistant!
Here the painting is already finished and varnished, and it is about to leave for its new home:
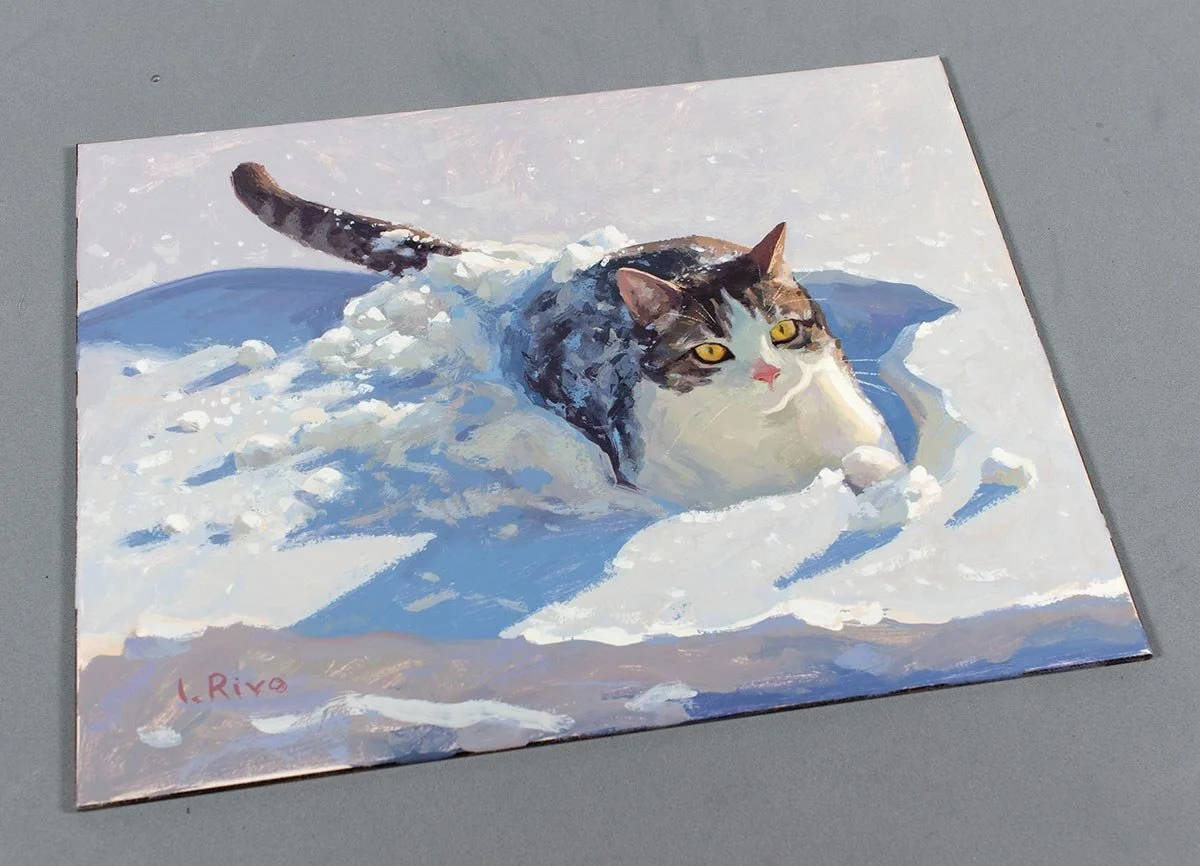
If you like experimenting with gouache on different painting surfaces, Ampersand Claybord and Aquabord are worth trying. Even though I enjoyed painting on Claybord, I now prefer sanded Aquabord for my varnished gouache paintings.
Gouache paintings done on these panels should be varnished because the excellent quality and pleasant weight of the panels make the extra step of varnishing worthwhile and produce nicely finished products ready to be framed without glass.
If you want to know about my process for varnishing gouache paintings, I have a full tutorial on this topic on my YouTube channel here:
I hope it was helpful.
Have a nice day!
Lena.
P.S. If you enjoyed this article you might also enjoy my free E-Books and painting guides that can be downloaded here: https://www.lenarivo.com/free-guides
Download my free 30-page PDF, “Everything you Need To Know About Gouache”
In this 30-page PDF you will learn:
How to decide which colors you need when you start with gouache and how you can expand your palette to make it even more effective.
What kind of storage palettes to use with gouache to prevent your beautiful colors from fast drying.
Why you need to use two whites with gouache.
How to choose the right paper and what kinds of brushes work best with gouache.
About the setup that I like using for plein air painting with gouache.
You will also be provided with many useful tips that will make your painting experience smoother.