The Painting Process - Issue Nº 1
Since there is no formula for a successful painting, no matter how skillful the artist, every new painting presents some new challenges and it often results in some unexpected revelations. Every time I paint I learn something new. So, in this series of emails, I am going to share with you the stories behind my paintings, my problem-solving process, and the discoveries I have made along the way. I hope that learning about my painting experiences helps you on your own artistic journey.
※※※※
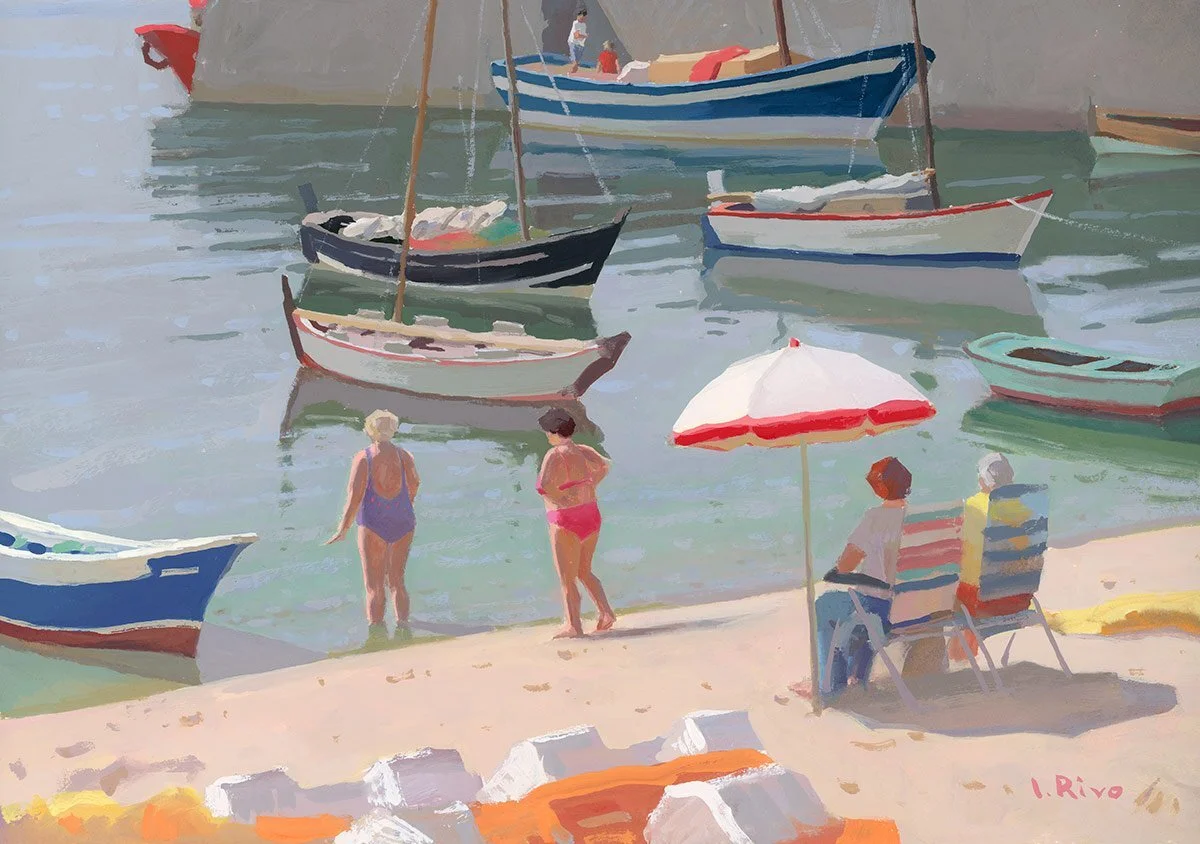
August on Arousa Island
I was very excited to start this painting, but I was also a bit nervous because I only had two photos that I took when I visited Arousa Island last August. I hadn’t been able to make studies on location because of the heat wave, so when working on this painting I had to rely only on my memory of that place and those photographs.
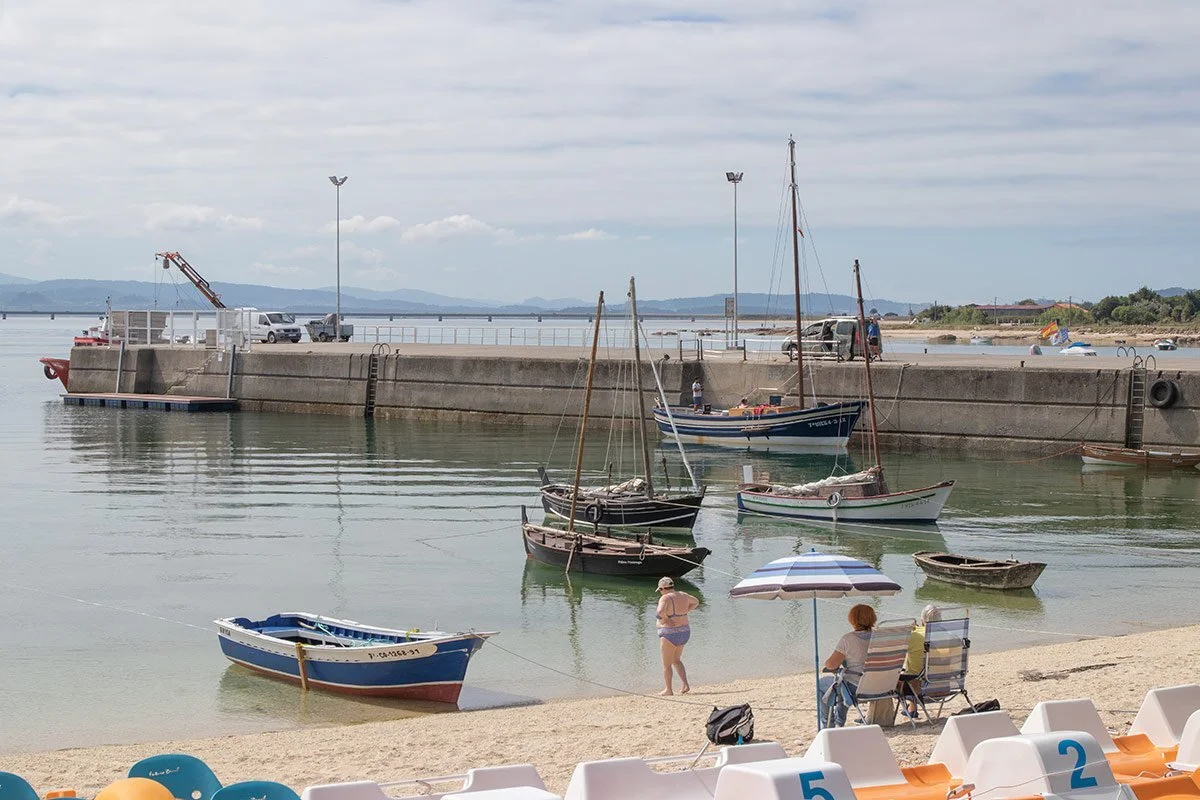
It was an overcast day with a thin veil of clouds which made the tonal value contrast quite soft, without any strong lights and darks. The color of the water appeared very neutral, almost gray. I wasn’t sure if my camera was capable of capturing the subtle differences between the different shades of the grays seen in the water, so I tried to memorize the colors when taking photographs of the scene.
My most important observation was that the water wasn’t blue at all. Instead, it appeared light purple-gray or reddish-gray. It was natural because the sky reflected in the water wasn’t blue either. It was covered with thin clouds. I knew that in the photos the water would just look neutral gray, so I tried to memorize its true color in relation to the greenish reflections of the boats, and I used those memories later when I worked on the painting in the studio.
As you can see, the photo reference shows much more of the landscape than my painting. When thinking about the composition for this painting I had to ask myself what I liked most about the scene. What made me want to paint it? And the answer was - the boats and their reflections that showed how calm the water was, and also the woman walking towards the water to wet her feet (the water is usually freezing on this coast all year round, but because of that it is also clean and transparent). Therefore I decided not to include the sky in the composition and instead, give the entire paper space to the boats and the figures on the beach.
Besides the two people sitting under the umbrella on that beach, there was a woman moving towards the water. I took two photos of her in different positions and then I used them to create two slightly different female figures in the painting: one woman standing in the water and the other going to join her. To make those two women look a bit different I changed the position of the arms of the woman standing in the water and the color of her hair. One of my ladies is wearing a swimsuit and the other a bikini.
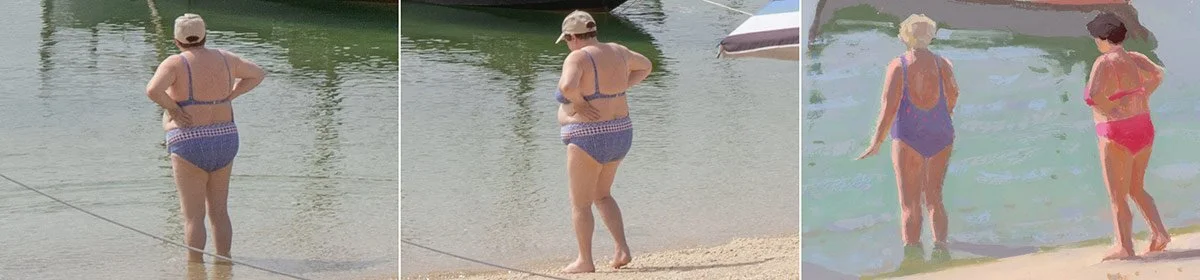
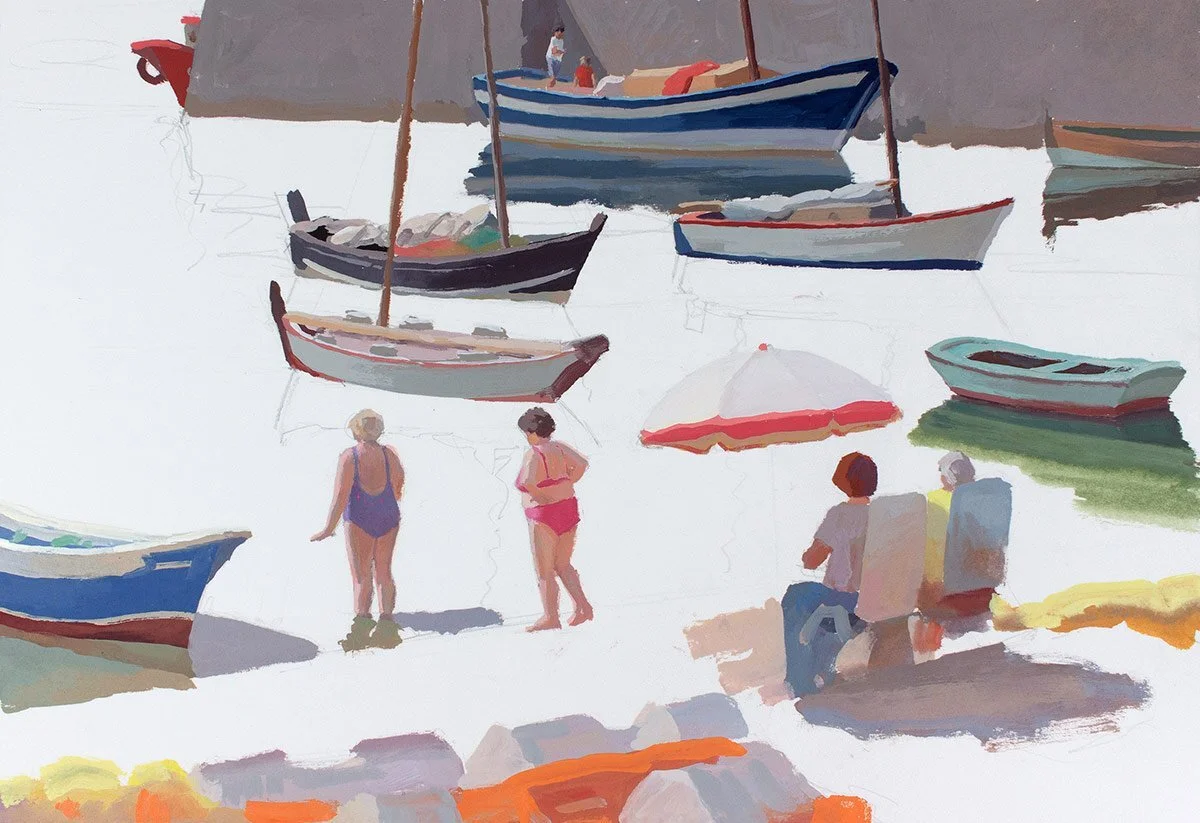
In the photographs, there were no really bright colors, so I had to use my imagination and add some vibrant colors to make a more cheerful painting. I painted some bright red stripes on the umbrella to complement the green reflections on the water and I made the rest of the umbrella pure white to separate it from the water. An umbrella is such a nice symbol of summer, so I wanted my umbrella to read well in this painting.
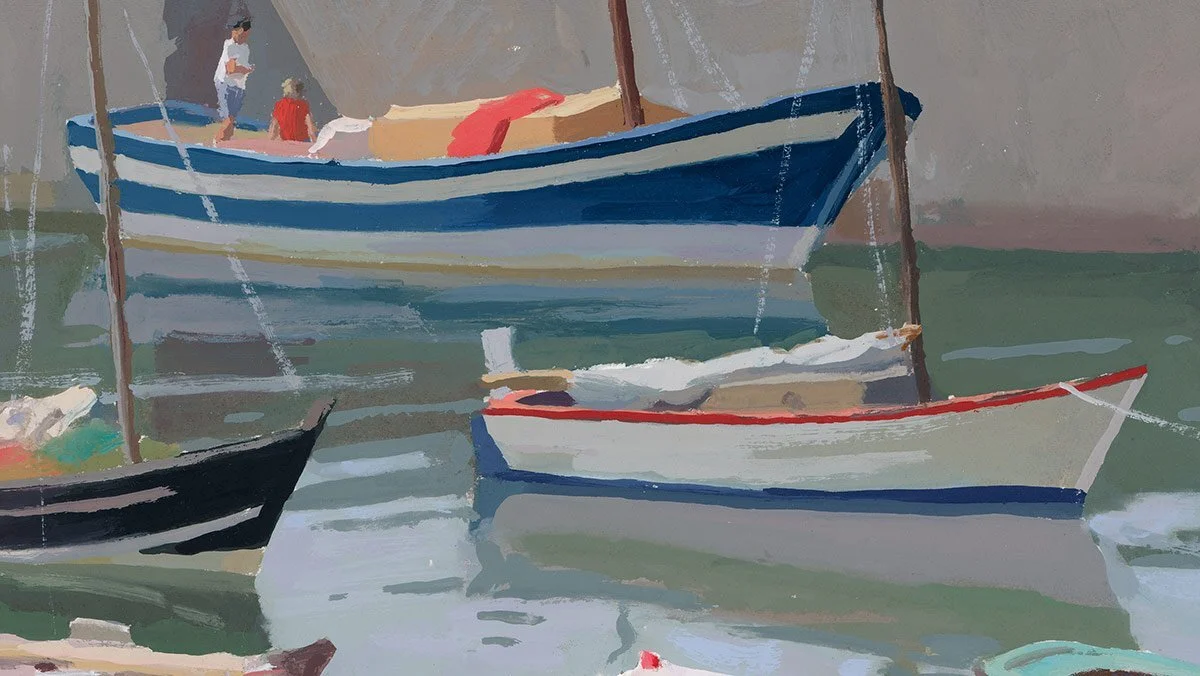
I also changed the colors of two of the boats because I didn’t want to have a black boat in the center of the composition. I made the dark brown boat in the center of the photo reference white and I made the old boat with the worn down paint at the right turquoise green, again, just to add more saturated colors to the painting in which neutral colors dominated.
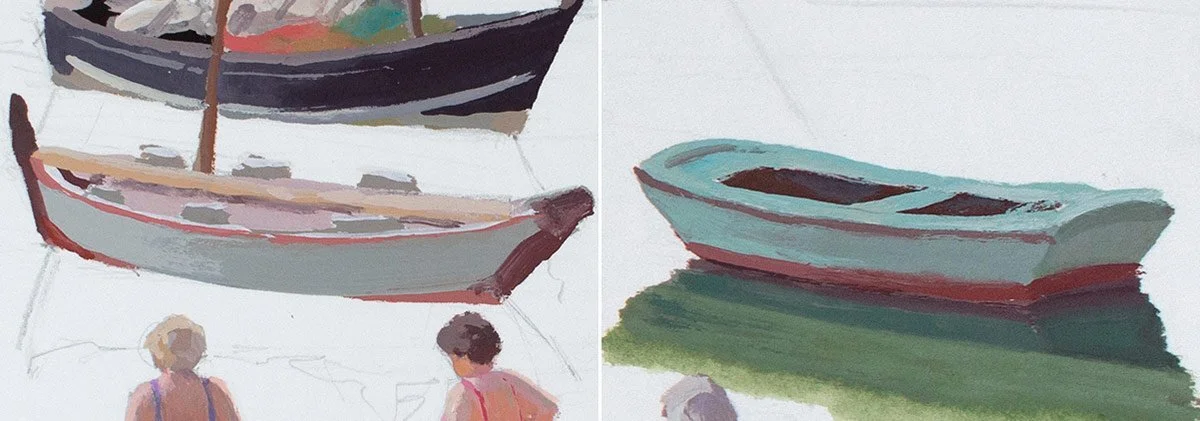
Painting the boats was enjoyable. I patiently painted one boat after another, making sure to create subtle color variations within every shadow and placing warm and cool colors of the same value side by side to add vibrancy to the painting and make it look more realistic without adding extra detail.
If you’d like to see the painting process for this painting you can click the link at the end of this email. That demo is a good example of how I usually approach compositions with many different middle-size objects. Small shapes can be painted on top of an already painted background but large and middle-sized shapes are the ones that hold the composition together, so I usually paint them first and only then do I start painting the background. When painted this way, the objects are better integrated into the painting and this approach also allows me to correct the outer edges of the objects, using the background color.
When working in the studio, I paint more slowly than when on location because painting from photos requires more brain work and experimentation in order to harmonize all the colors and values in the painting. On location, I don’t need to think, just react, but when working from a photo, I need to carefully analyze every color before mixing it and adding it to my painting. It took me three 2-hour painting sessions to complete this painting. Its size is 9x12 inches and it was painted with gouache.
Here is the link to the demo video: https://youtu.be/eaJvWnBvDIA
I hope you enjoyed this article :)
Happy painting!
Lena
P.S. If you enjoyed this article you might also enjoy my free E-Books and painting guides that can be downloaded here: https://www.lenarivo.com/free-guides
Download my free 30-page PDF, “Everything you Need To Know About Gouache”
In this 30-page PDF you will learn:
How to decide which colors you need when you start with gouache and how you can expand your palette to make it even more effective.
What kind of storage palettes to use with gouache to prevent your beautiful colors from fast drying.
Why you need to use two whites with gouache.
How to choose the right paper and what kinds of brushes work best with gouache.
About the setup that I like using for plein air painting with gouache.
You will also be provided with many useful tips that will make your painting experience smoother.